 Pin it
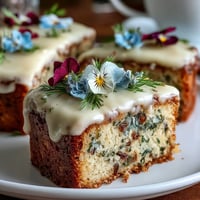
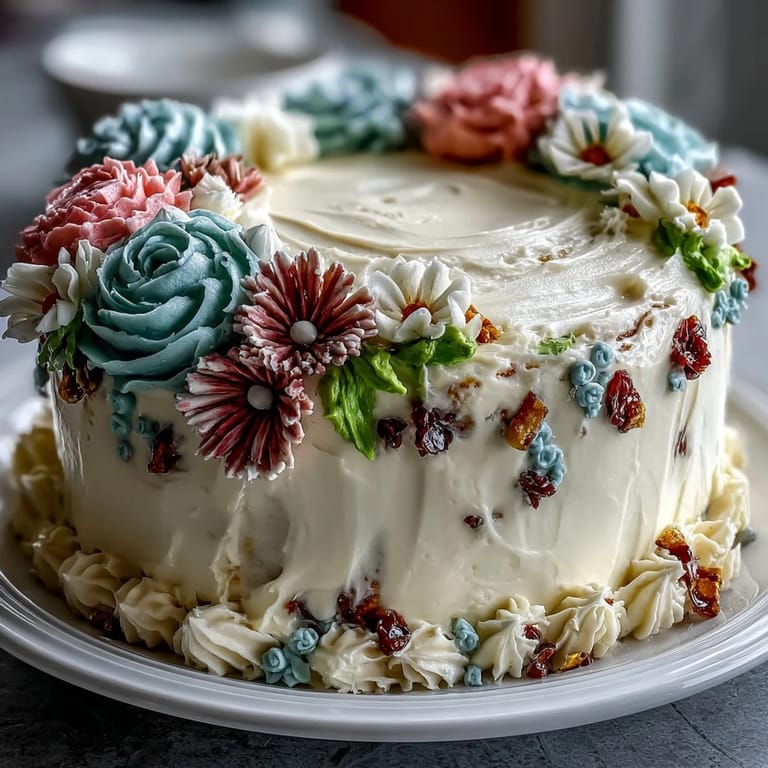
 My friend texted me at midnight, half-panicked and half-excited, asking if I could bake a cake that screamed both celebration and sophistication. Her cousin was graduating and turning twenty-five on the same day, and she wanted something that felt like a milestone, not just dessert. I found myself pulling out my mixer at 6 AM, thinking about how a Taurus would appreciate something solid and beautiful, something you could actually taste beneath the glamour. That's when this cake came together in my head: layers of buttery vanilla holding up delicate piped flowers, each petal a small act of care.
Standing in my kitchen with that turntable spinning slowly, I remembered why I love decorating cakes: it's the only time my mind completely stops racing. My hands took over, piping tiny roses and leaves while a playlist of 90s indie rock played in the background. When I stepped back and saw the whole thing finished, gold leaf catching the afternoon light, I understood why people commission these. It wasn't just cake anymore.
Ingredients
- All-purpose flour (2 1/2 cups): The foundation that keeps your layers from turning into clouds; measure by spooning into a cup rather than scooping directly from the bag, which packs too much flour and dries out the cake.
- Baking powder (2 1/2 tsp): Your lift and rise, crucial for that tender crumb texture that makes people go quiet when they take the first bite.
- Salt (1/2 tsp): Don't skip this; it amplifies the vanilla and balances sweetness in a way that makes the whole cake taste less cloying.
- Unsalted butter for cake (1 cup, softened): Room temperature is non-negotiable here because cold butter won't cream properly with the sugar, and you need that aeration for a light cake.
- Granulated sugar (2 cups): The structure and sweetness; creaming it with butter for 3-4 minutes creates tiny air pockets that give the cake its tender crumb.
- Large eggs (4, room temperature): Cold eggs won't incorporate smoothly and can make your batter grainy; let them sit on the counter while you prepare everything else.
- Pure vanilla extract (1 tbsp): Use real vanilla, not imitation, especially when vanilla is the star flavor; the difference is immediate and undeniable.
- Whole milk (1 cup, room temperature): The acid and moisture that keeps the cake from being dense; cold milk can seize up with the warm batter and create lumps.
- Unsalted butter for frosting (1 1/2 cups, softened): This needs to be at the exact right temperature, almost at the point of melting but still structured enough to hold air.
- Powdered sugar, sifted (5 cups): Sift it first or your frosting will have tiny lumps that catch your piping tip and ruin your flowers; trust me on this one.
- Pure vanilla extract for frosting (2 tsp): A little more than in the cake because frosting mutes flavors slightly.
- Heavy cream or milk (2-4 tbsp): Start with two tablespoons and add more until the buttercream reaches the right consistency for both spreading and piping.
- Gel food coloring in floral shades: Gel coloring won't thin your frosting like liquid dyes do, and floral colors (sage green, dusty pink, lavender, soft yellow) photograph beautifully and feel intentional.
- Edible gold leaf or gold sprinkles (optional): For a Taurus-specific touch that feels luxe without being over the top.
Tired of Takeout? 🥡
Get 10 meals you can make faster than delivery arrives. Seriously.
One email. No spam. Unsubscribe anytime.
Instructions
- Set yourself up for success:
- Preheat your oven to 350°F and let it sit there for a few minutes so it's truly ready. Grease all three cake pans and line the bottoms with parchment paper cut to fit perfectly; this is what saves you from a stuck cake layer at 2 PM when you're already stressed.
- Combine your dry ingredients:
- Whisk flour, baking powder, and salt in a bowl until they're evenly distributed, which takes less time than you think but prevents dense pockets of baking powder in your baked cake.
- Cream butter and sugar until clouds form:
- Beat them together for a full 3-4 minutes until the mixture is noticeably lighter in color and fluffy; this aerates the batter and sets up the cake's tender texture. The sound the mixer makes will change as it incorporates air, becoming quieter and less aggressive.
- Add eggs one at a time with patience:
- Drop in each egg and wait until it's fully incorporated before adding the next; this prevents that split, curdled appearance that happens when you rush. Each egg should disappear into the mixture with a little patience.
- Alternate flour and milk in three batches:
- Start with flour, add milk, then flour again, ending with flour; this prevents overmixing, which toughens the gluten and ruins the tender crumb you've worked for. Mix just until each addition disappears into the batter, no more.
- Divide and bake evenly:
- Split the batter as equally as possible among the three pans and smooth the tops with an offset spatula. Bake for 28-35 minutes until a toothpick in the center comes out clean with maybe one or two crumbs clinging to it.
- Cool with intention:
- Let the cakes cool in the pans for exactly ten minutes, then turn them out onto wire racks and let them cool completely before touching them again. Warm cake is fragile cake.
- Beat the buttercream to silky perfection:
- Start with soft butter on medium speed until creamy, then gradually add powdered sugar while beating to incorporate it smoothly and prevent lumps. The gradual addition is what keeps it smooth rather than grainy.
- Reach the right consistency:
- Add vanilla and start with two tablespoons of cream, then add more one tablespoon at a time until the buttercream is fluffy but still holds a shape when piped. You're aiming for something that spreads smoothly but doesn't slump.
- Tint your frosting with precision:
- Divide the buttercream into separate bowls and add gel coloring one drop at a time, stirring thoroughly; gel coloring is concentrated and one extra drop can shift the shade dramatically. Let colors sit for a minute so you can see the true final shade.
- Level your cake layers:
- If any cake layers have domed tops, use a serrated knife or cake leveler to slice them flat; this creates stable stacking and even layers that look professional. Take your time with this step.
- Build your cake base:
- Place the first layer on your serving plate, spread a thin layer of buttercream on top, then repeat with the second layer and frosting. This creates the structure that holds everything together.
- Apply the crumb coat:
- Spread a thin layer of frosting all over the cake to seal in any crumbs, then chill for twenty minutes until it sets firm. This is what keeps crumbs out of your final coat and makes everything look polished.
- Create a smooth final coat:
- Apply a thicker layer of frosting over the crumb coat with an offset spatula, using an up-and-down motion rather than swirling to avoid dragging crumbs through it. A cake turntable makes this easier because you can spin it as you work.
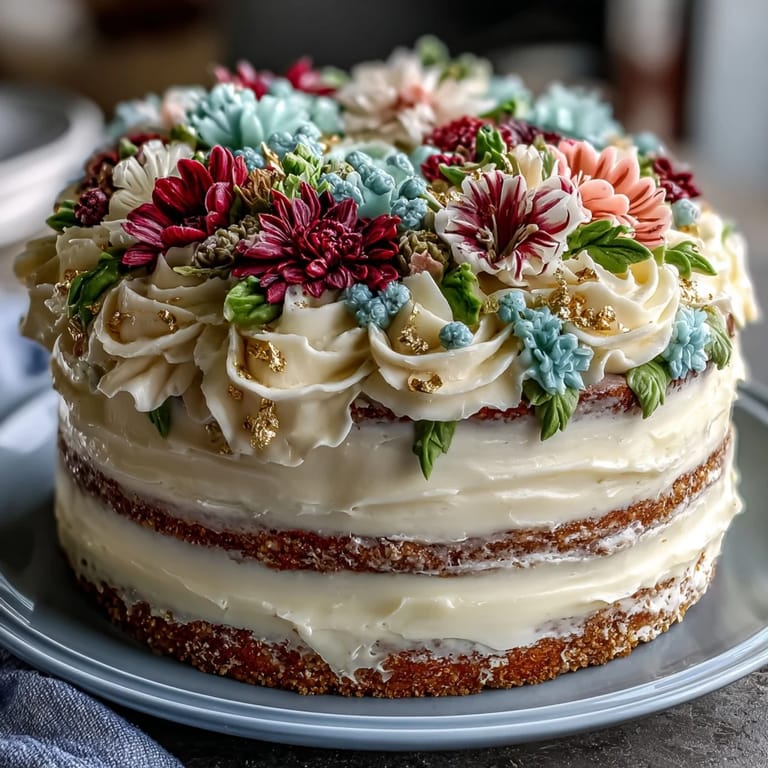
- Pipe your floral designs:
- Fill piping bags with your colored buttercream and use different tips to create roses, petals, leaves, and vines across the cake. Start with the tip lightly touching the frosting, squeeze gently, and pull away to create natural-looking shapes; it takes practice but also forgiveness.
- Add your final touches:
- Use gold leaf or sprinkles to add a Taurus symbol or graduation cap accent if desired, placing it deliberately rather than randomly scattered. Step back and look at the whole cake to make sure the florals feel balanced.
- Chill before serving:
- Refrigerate until serving time, then let the cake sit at room temperature for 20-30 minutes before slicing so the flavors come alive and the cake is easy to cut.
 Pin it
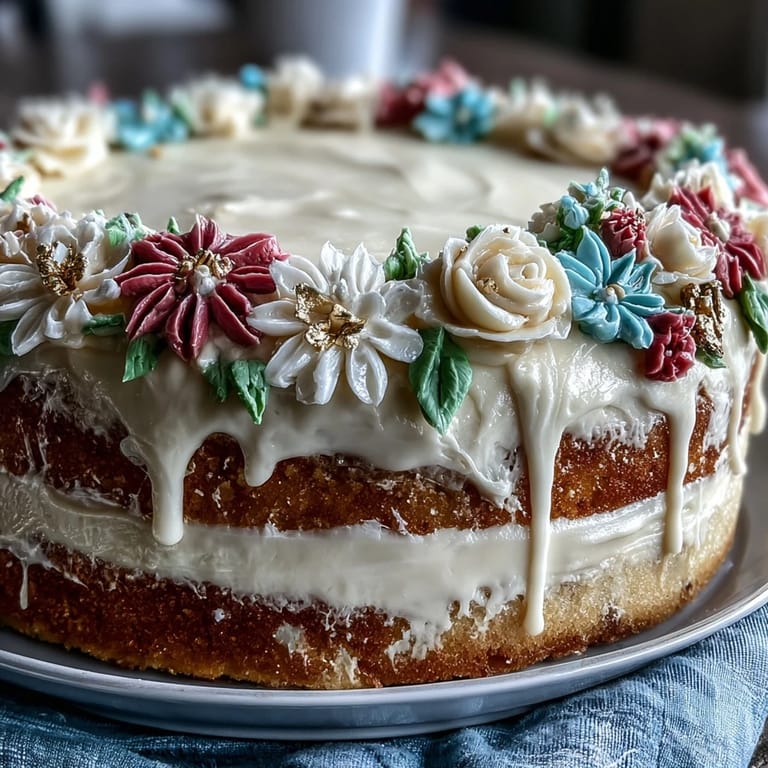
 Two hours after I finished decorating, I got a photo from the party: the cake sitting front and center on a table with twinkle lights, surrounded by champagne flutes and smiling faces. My friend texted later that the graduate had cried a little when she saw it, not because it was perfect, but because someone had spent that much time thinking about what would make her feel celebrated. That's when I realized that baking these kind of cakes is really just a love language spelled out in flour and buttercream.
The Vanilla Cake Science Behind the Elegance
This cake works because of how carefully the ingredients are combined and in what order. The creaming step isn't just mixing; it's incorporating tiny pockets of air that expand during baking and create lift. When you alternate the dry ingredients with the milk, you're managing gluten development, which is why you only mix until combined rather than until smooth. Overmixing develops gluten, which makes the cake tough and dense instead of tender and elegant. The result is a cake that's sturdy enough to stack and decorate but still feels special on the tongue.
Buttercream Consistency and the Art of Piping
The difference between frosting that pipes beautifully and frosting that collapses is usually just a tablespoon of cream. Too stiff and it tears; too loose and it slumps into puddles. When you're adding cream, go slowly and test by piping a small flower on the side of the cake first. Watch how it holds its shape and adjust before committing to the entire cake. Temperature matters too; if your frosting gets soft while you work, pop it in the fridge for ten minutes and it'll firm right back up without losing the fluffy texture.
Personalization That Feels Intentional
The beauty of this cake is that it's a canvas for the person being celebrated. You can match the floral colors to their favorite hues, add their initials in gold, or incorporate a small symbol that means something to them. One time I made this cake with green and white flowers for someone studying environmental science, and the small intentional touches made it feel like the cake was specifically baked for them, not just a pretty cake that happened to show up. These moments are where baking becomes personal storytelling.
- Consider the graduate's favorite colors and weave them into the floral palette rather than defaulting to pastels.
- A Taurus zodiac symbol piped in gold or added as an accent is subtle but meaningful if the person celebrates their astrology.
- If time is short, stick to a simpler piping pattern with one or two colors rather than rushing a complicated design that looks stressed.
 Pin it
 This cake became my go-to when I want to celebrate someone properly, when a store-bought option feels insufficient and a simple cake feels like it's missing the point. It's the kind of cake that takes time but doesn't require professional skill, just patience and care.
Recipe FAQs
- → How do I achieve vibrant floral buttercream colors?
Use gel-based food coloring for concentrated hues without thinning the frosting. Add colors gradually to reach desired shades.
- → Can I prepare the buttercream decorations in advance?
Yes, pipe floral designs onto parchment, chill until firm, then carefully transfer onto the cake for intricate detailing.
- → What is the best way to ensure even cake layers?
Level cooled cakes with a serrated knife or cake leveler before stacking to ensure uniform layers and stable assembly.
- → How long should the cake chill before serving?
Chill the decorated cake for at least 20 minutes to set the crumb coat and final design, then bring to room temperature before slicing.
- → What alternatives can enhance the flavor of the cake?
Add 1 tsp almond extract to the batter for a subtle nutty aroma that complements the vanilla base.